Whenever you decide to embark on a photo-focused wildlife adventure, one of the main things you will be turning your attention to is the gear you will be taking with you, and, ultimately, how you are going to maximize it.
As I’m always being asked about settings and equipment, I thought I’d throw some of my experiences down for you here: it’s not exhaustive, but I hope it gives you a bit of an insight into the considerations you need to make on your path to being a fully-fledge wildlife photographer!
This guide is intended to walk you through the packing considerations and equipment you might need, as well as some basic techniques to think about before you arrive in country. Mastering some of these will take the pressure of you when you get presented with the picture-taking opportunity you have been dreaming of before departure, and ultimately enable more thought to go into composition and style…the key elements of all winning pictures.
Kit and packing
For now, we’ll ignore the pains of internal flights and their baggage restrictions. Indeed, in over 20 years of travelling to photograph wildlife, and taking up to 40lbs of kit on board with me as hand baggage, I have yet to be refused. For the most part, airlines completely understand that you are carrying sensitive, expensive kit, and as such are loath to take it from you at the desk, or secrete it at the back of the aircraft. The most important thing is to make sure your baggage does not appear obtrusive. Always ensure that your biggest bag will fit under a seat – that removes a lot of the issues straightaway – and don’t dilly dally when it comes to boarding: get on, get sat, and get the bag squirrelled away! Depending on the time of year and ultimate destination you are flying to, there are other ways of ambling guilt-free onto the aircraft. When you can make use of those big winter jacket pockets for camera bodies or lenses; put one of your longer lenses on a strap and have it over your shoulder; fix a smaller lens to a body and have it “to take pictures as you fly” so you can carry it on, and also – if you happen to have one – put on that sleeveless “safari blouson” that you’ve had hanging in the wardrobe for years. Whilst these days the latter are generally redundant in the field a lot of the time, they do offer the benefit of an inordinately favourable garment-size-to-pocket-frequency ratio, and you can certainly take advantage of that!
Be choosy!
The kit you carry will of course be determined by the destination you are heading for and the conditions you will face, and, naturally, the types of image you are trying to secure. On the basis that the reason you signed up for one of Naturetrek’s photo tours, however, it would be reasonable to assume that you are after securing your own stunning record of the natural world and that will mean a major focus on the wildlife itself. This is far from an exhaustive list, and also should not be taken as an absolute “must have”, but it will give you an idea of the type of gear I would tend to carry with me for most assignments.
- An extender (nice segue from point 1 there!); A 1.4 is perfect and enough; generally a 2x extender will result in image quality loss. Fixed to a 100-400 (which tends to be the most abundant lens I see carried by most), you will have a reach of 560mm at the upper end. Yes, you will lose some light, and it’s not a substitute for a fixed option, but it is a cost effective alternative when you’re starting out.
- Your longest focal length lens: be it 300, 400, 500 or 600 or a zoom that gives you the same amount of reach. Regardless of where you are heading, you will ALWAYS want the option to have that degree of reach. I personally (for reference my equipment is all Canon), carry a 600mm and a 200-400mm with built-in extender.
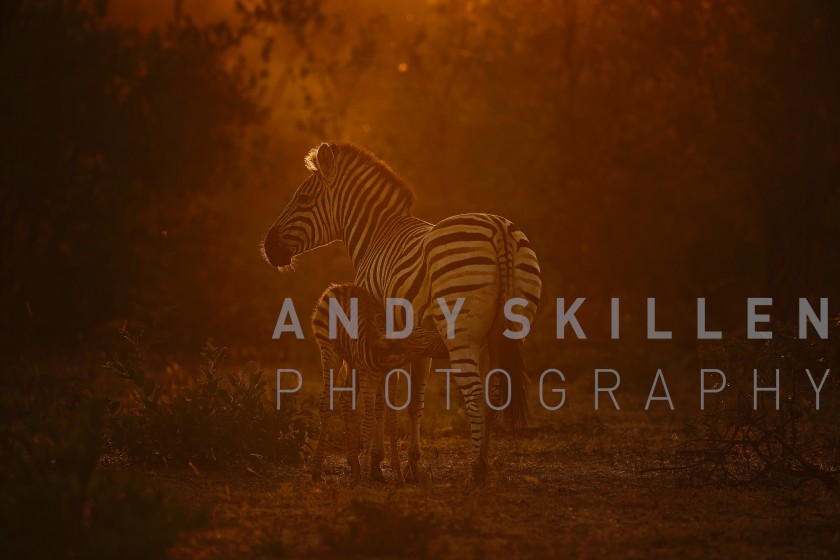
- A wide angle for landscapes, night photography, northern lights etc. Whilst many reactions on a trip will be to always to think “big lens, close-up”, there are some fantastic creative options that a wide angle lens throws up. Asides from the obvious night-sky benefits, and other climatic conditions that we might want to record, they give the excellent opportunity to put scenes in context by shrinking the main feature creature. We also have, in certain circumstances, the chance to get up close to wildlife at ground level, and record a wide-angle close up. This type of photography is very in vogue, and can give stunning results with the exaggerated perspective it provides. For reference, I will carry a 14mm fixed lens for this purpose, but anything up to a range of 35mm would be ideal. There are many lenses that offer a 24-70 or 24-105 option in this regard, and these work very well with the advantage of being a little more flexible in other situations too.
- A mid-range zoom. For me, in this category would be a combination of a 70-200mm lens and a 200-400mm. lens. Such lenses are more easy to hand-hold quickly, and in certain locations (thick forest for example) are far more practical. Sometimes we will be close to the wildlife and you will curse the day that you decided to only have your 500/600 fixed to the body!
- Two camera bodies. Whilst this is not practical for everyone, it is strongly advised you at least have a back-up. Why? Well, two bodies do enable you to have 2 lenses attached at any time, which increases your chance of being flexible in the field. However, the other reason for most people embarking on a photography holiday is that, well, if something actually went wrong with body no. 1….you at least still have a way of recording your images out in the field until we get the chance to get back and try and remedy the situation.
- Batteries: ok, so now I’m stating the obvious…but ensure you have at least one spare and that it is always fully charged. Check the recharge performance on your batteries before you go, and if necessary either calibrate them, or discharge them completely and recharge from zero. A simple way to do this is to set your camera to take a 4 hour exposure at night, and let it run down. It is always far more preferable to recharge from scratch. When we are in the field, we might not have that option as time might not allow it, and therefore in that situation we will keep our batteries topped up each night.
- Cleaning equipment: a microfibre cloth and dust blower are essentials, and if you have them, lens pen style cleaners are great to bring along.
- Camera covers: whilst you don’t need super-dooper camouflaged gear, it is always advisable to have something to help protect the body and or lens. It can be as simple as a cloth bag, or inexpensive dust bag that you can throw over your beloved equipment as you travel. I would certainly look at lens caps if you can, as fiddly plastic ones on small diameter lenses can often get dropped and lost and tend to be their fiddly-worst at the point when you need to get the lens exposed quickly. A soft lens cap (or again, improvise with a bag) that you can throw over the end and pull off easily will be a godsend in the field. Dust and water are your enemies….defeat them at every opportunity J
- Filters: generally, with wildlife, we will rarely use creative filters. However, a polarizer is not a bad extra to carry to shoot through reflections and darken skies in certain “context-style” shots. If you are thinking you will be aiming to capture landscapes too, then, of course, there is no harm in bringing along your graded filters, big-stoppers and the like too.
- A remote release cable: essential for night photography and certain landscape situations. We can also use this for creating time lapse too.
- Supports: here, of course, I am referring to camera rather than emotional 😉 Most of the time, a beanbag will be what you need, which, if you don’t possess one, can be improvised with a tightly bound fleece/jumper or – again – soft cloth bag that you can carry with you, and pack full of sand, rice, socks or anything else suitable to create a malleable “pillow” on which you will rest your bigger lenses. Tripods are always good to bring, and essential of course for landscapes and longer exposures, as well as some more distant photography when we are on foot. However, in vehicles they serve little purpose, and you will spend more time trying to get the legs not to stab someone in the foot than you will taking pictures. A monopod is not a bad compromise in this situation if you have one, and can come in handy when you want to give those arms a rest from pointing at the leopard kill for an hour! Tripod heads are always a consideration too. Most will own a ball head, which gives a good degree of flexibility in many situations. However, if you are considering investing in a longer focal length lens, then a gimbal head (such as a Wimberley) will become the most important. This type of head is far easier to adjust and obtain the right degree of tension in, providing a full fluid range of movement and excellent support.
- When it comes to the kit…arguably the most important thing is that you know how to use it, and how to get to it quickly. Always bear in mind that things can happen quickly, and if, therefore you are searching your bag through a maze of 100 filters to look for the right lens….you are most likely about to miss the shot.
Know your functions…and your shooting style
The great thing about wildlife photography, and photography in general of course, is that there is no right or wrong style. We will all have our individual take on a situation, a preferred type of picture that we like, or wish, to take. Going on a photographic-focused trip is a great way of developing that skill and the chance to experiment with some new techniques. Alternatively, this might be your first venture out into the field to capture some great wildlife shots and you are looking to test your abilities and increase your level of understanding. Wherever you are in the photo-taking scheme of things, however, there are some hard and fast lessons that we can all ensure we are on top of. The more preparation you can do before you travel, the better your photo experience will be as you will be spending less time worrying about the “how” and concentrating more on the “now”. To point in the right direction, I’ve put together a list of key elements that you should be paying attention to. On top of this there are a whole bunch of more advanced operations and functions, but for the most part, an understanding of the following will be of massive benefit when the moment comes!
Know your camera
Ok – so this sounds a bit obvious, right? But, the amount of people I see with fantastic photo opportunities who do not where and how to change a setting on their camera is huge. You do NOT need to memorise 125 different functions on your camera body, BUT you do need to try and master the idea of where the main input functions that will affect your pictures are located, and how you can quickly access them. Conditions can change quickly in a wildlife situation, in terms of action, lighting and composition, and we need to have the same speed of thought. The more pressure we can take off ourselves by being relatively automated in terms of where the necessary “buttons to press” are located, the quicker our responses will be and ultimately, the better our pictures will be too. I like to try and get people to be able to access all the functions they require without moving their eye from the viewfinder. In some cameras, and in certain circumstances, this is not always impossible, but for the most part it is attainable and the more you can do without having to look at the back or top of the camera, the better. Ideally, you should aim at targeting the following without moving your eye away:
- Changing ISO speed
- Changing focus point
- Changing aperture or shutter speed (depending on your preferred mode of shooting)
- Applying exposure compensation
- Assessing battery life
- Applying exposure lock
- Moving from evaluative to spot metering
- Moving from “one shot” mode, to “Servo” (or equivalent)
If you can manage to achieve most or all of the above, you will be well on the way to increasing your hit rate. Practising the muscle memory needed in that finger and thumb to achieve this will be time well spent…even if it seems a bit boring at the moment!
Changing target
Shooting modes
There is no hard and fast rule when it comes to your choice of mode…except that anything that is “P” or “full green rectangle” or “fully auto” is not just banned…it will be positively frowned upon 😉 You have a great DSLR at your disposal, so work with it and see what you can do!
There are varying schools of thought on what people like to shoot with here, with the principal choices coming down to:
Av – aperture priority; Tv – shutter priority; M –“fully” manual
For the most part either of the first two will be all you need. Fully manual does allow you to make two input settings (ie. aperture AND shutter speed), but unless you go for an automatic ISO selection to back it up, your chances of producing a poorly exposed image are far greater. The reality of it is that you if you understand the interplay of the three variables of ISO speed, shutter speed and aperture size, then you can control the whole situation with the use of the Av or Tv modes.
For what it’s worth, I shoot predominantly with Av. This is because, for me, it gives the most artistic control over the image. By shooting at f2.8 or up to f16, I can dramatically change the style of picture I convey. Of course, as I adjust my aperture accordingly, my shutter speed becomes affected, and as such in order to maintain a speed suitable for a sharp image, I can adjust my ISO until I get to the right level. Likewise, if the conditions dictate that my choice of aperture enables a very high shutter speed to be achievable, even when I don’t need it, then I can simply lower my ISO…with the added benefit being that the lower it gets, the better the image will look from a noise perspective. This interplay of the three variables is the main element for you to master and understand, and with practice, you will see how the alteration of one affects the others.
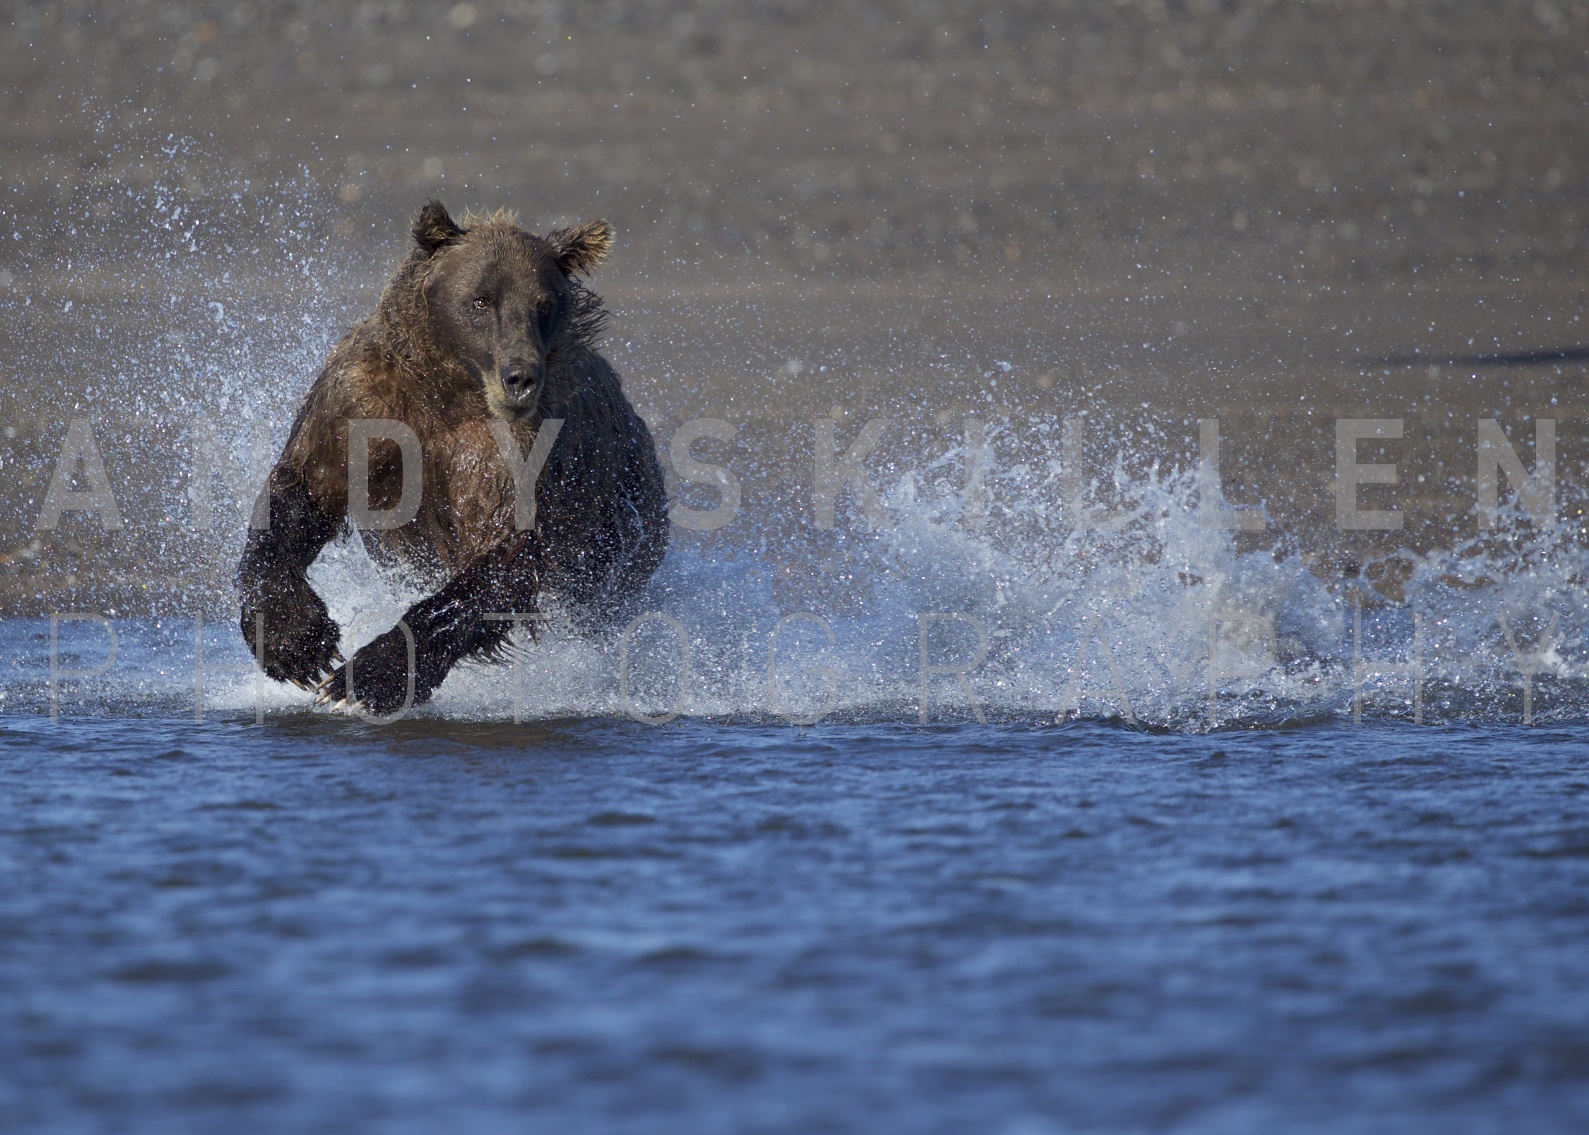
Of course, wildlife is about action. We all want the leaping salmon picture, right? In these situations, you may aim for a high shutter speed to “freeze” the moment. Again, rather than switch from Av to Tv in this situation, I simply manipulate my aperture to give me the shutter speed I want, dialing it down to f5.6, f4.0 or f2.8 perhaps. If I have the luxury of bright light, then I can keep a higher f-stop number if I want to throw more into focus – a blessing in many situations, keeping my shutter speed at 1/1000 or higher to really stop things in mid-air. Again, in these situations, an adjustment of ISO will also help you maintain the effect you want. By controlling things in this way it is you that has the total creative input to the picture, allowing you to “think” of the image you want, rather than shooting blindly and letting the camera compromise everything for you.
Focus Points: keep it sharp!
Ah….the key frustration for most, and yet when mastered, it will be transformational for your picture taking. In general, the best thing to do is try for a single focus point and master your technique in keeping that point on the subject’s eye. That is ultimately your goal – a sharp eye on a photograph is 99% of the time the make or break element. A number of factors will come into play in this regard, not least your ability to keep the camera steady through either using a support, or having good hand-held technique, and this can be directly affected by the shutter speed you have chosen or been presented with…so always keep an eye on that when moving that aperture around! However, a misplaced focus point is also a sure-fire way to have a missed opportunity. In general, the most reliable focus point is the central one, and in certain situations it works perfectly well. However, your viewfinder has a large number of flashing red rectangles and points for you to play with, so why not use them? For me, I use a single focus point for the vast majority of the time, and concentrate on keeping that on the eye of the subject. On occasion I would use an expanded 4 points, perhaps with a particularly erratic bird in flight, but on the main that would be it. You should find that on your own camera body there are a range of options open to you, and if you can work down to using a single point, then you will, again, be rewarded in the image stakes. The movement of this point around the viewfinder is the key here, however. Understand which of your input dials (or joystick) does the job, and get used to being able to shift that point right round the viewfinder to deal with changing situations. In the case of the latter, the more you can anticipate (“see the shot before you take it”), the better of course. If you want your subject top left coming into the picture, or have its eye super-sharp as it fills your viewfinder from left to right, you will need to master the rapid movement of that point…without taking your eye away from the camera. This does lead us into composition of course, and that would be a whole different guide and points that we would discuss in the field in live situations, so for now concentrating on perfecting that function will serve you well.
One Shot or Servo?
For the most part, wildlife moves around enough to warrant you using Servo as your default mode. The same principles apply here to utilizing the array of focus points at your disposal, enabling you to track movement where you want it in the frame. With most cameras now there is the opportunity to customize the sensitivity of your Servo mode in terms of how locked-on or responsive it is, and a little investigation of that in your camera manual will be time well spent. However, for most, the default Servo mode is a good place to start, and perfectly adequate for the vast majority of situations.
Why therefore would we still consider “One Shot”? Well, in a number of situations, wildlife can also sit pretty still and as such, one shot is a great way of increasing sharpness. With Servo the camera and lens is always looking for movement, but with one shot, then it will stay locked on the subject once you’ve selected it. Whilst this is not an issue, and Servo will work well in 95% of the situations, the chance to use one shot may increase sharpness in certain circumstances. There are two main ways of achieving this:
- shifting modes manually from One Shot to Servo
- using back button focus
Ok…the first is easy, right? All you have to do is hit the mode, dial it in, refocus etc etc…hhhmmmm ….sounds a long time to me. Hence, “back button” focus. By using one of the buttons on the back of the camera to activate focus, rather than the “half held” shutter button, you can make the switch from One Shot to Servo nice and easy without ever having to change mode. To understand this fully takes a bit longer than we have the time for here. However, the basic principle is that the back button on the camera will activate Servo all the time it is depressed, and when released will switch to a one-shot, stay focused on the last subject mode. Your trigger finger simply fires the shutter when you achieve the shot you want. It also means that you can quickly acquire focus with a central point, by pressing the button once and releasing, and then reframe your shot knowing your subject will remain locked. Brilliant! You can still achieve this by using the half-down shutter mode of course, but it does entail a messy move from one mode to another. If that stationary subject of yours, for example, decides to suddenly jump or fly, then you will have little if any chance of moving to Servo in good enough time to capture it. Back-button focus overcomes this problem and means you can merrily switch between the two instantly. Of course, using two buttons to focus and shoot may seem a little counter-intuitive at first, but it works beautifully if you can get your head round it. Don’t panic if you can’t, but give it a try and see what you think.
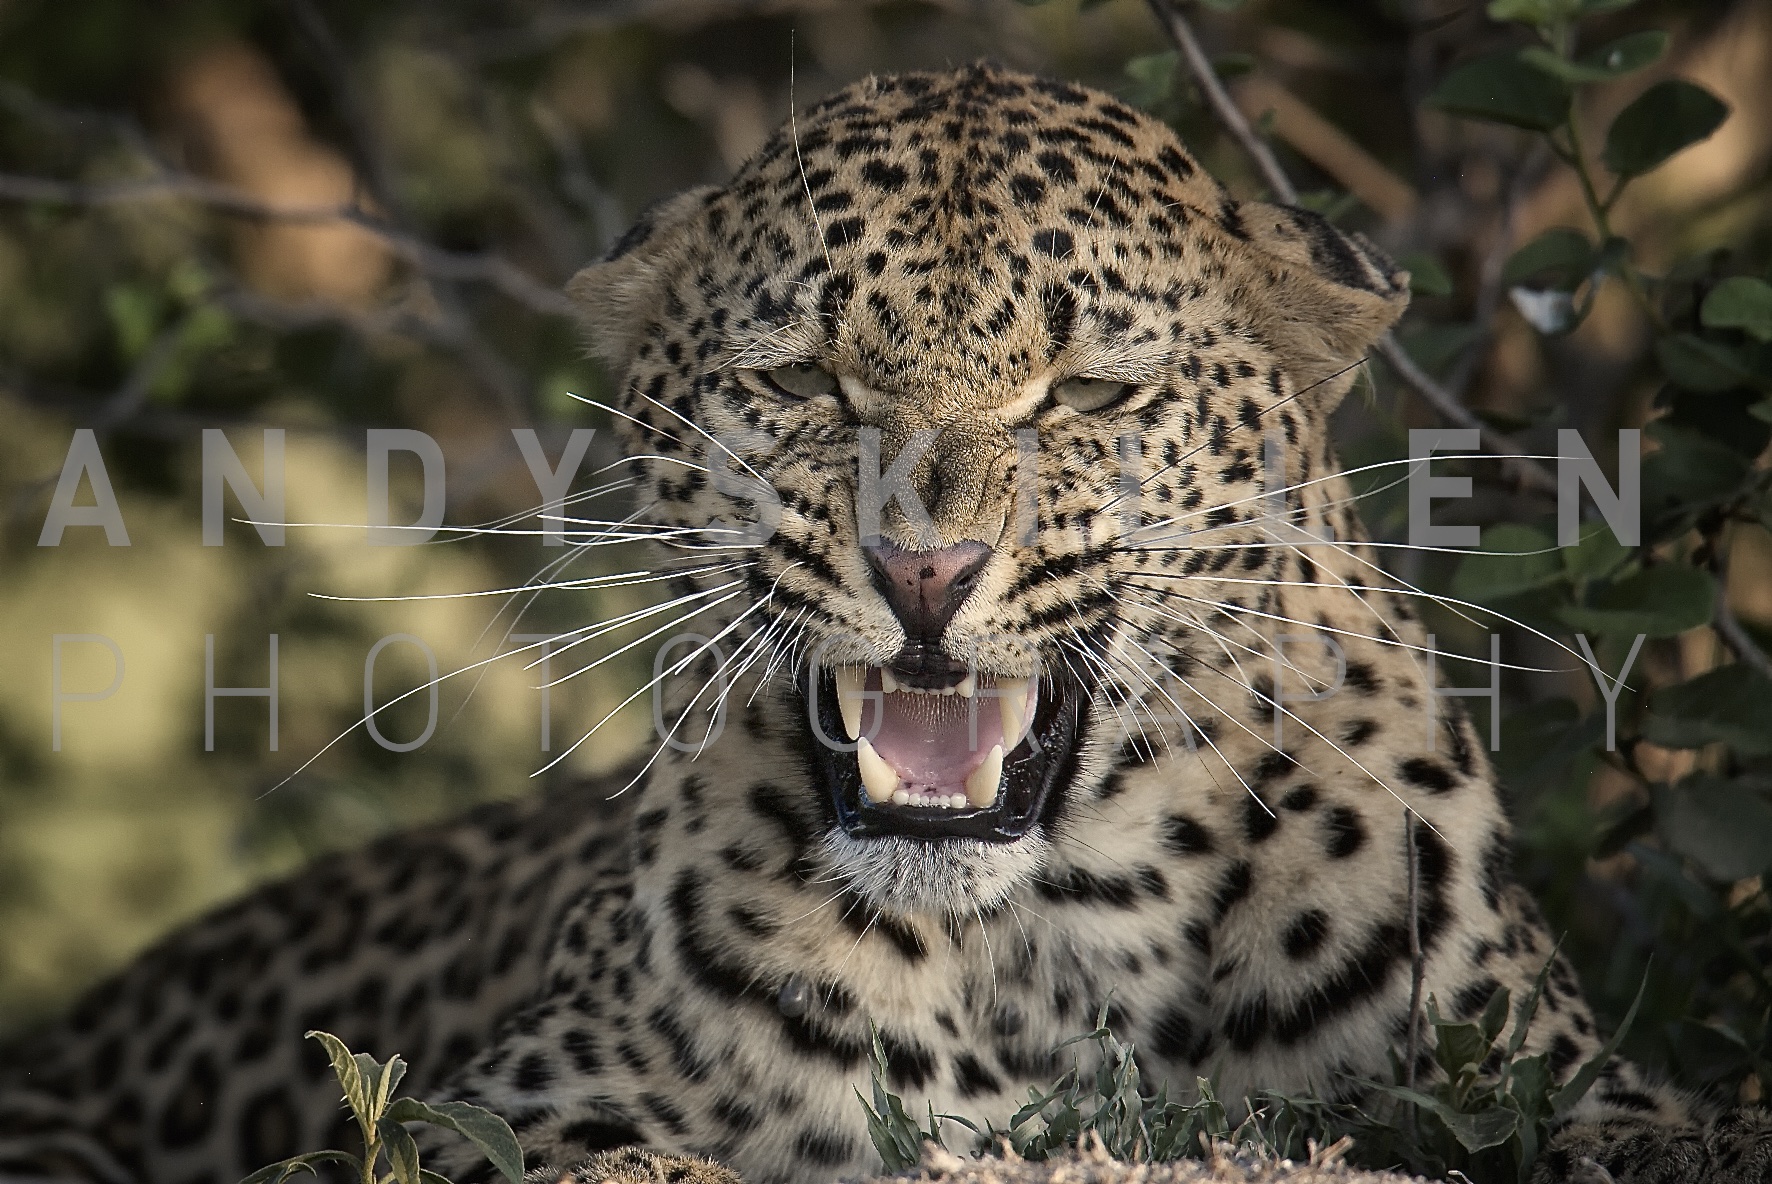
Too close for comfort
RAW or Jpeg?
For professionals, this does not enter the equation: it’s RAW all the way. If you currently shoot in jpeg mode, you will be capturing great images, but ultimately you are still compromising your final result. Yes, you can still manipulate and correct a jpeg later, but your options are more limited if you’ve not captured all the information from a scene in the first place.
Exposure compensation: the histogram
Modern DSLRs do a great job when it comes to exposure, and the evaluative metering option will cover most situations that you find yourself in. However, there are a few things to consider, and as ever, more than one way of solving them.
- Shooting in snow/ice: invariably, in this situation, evaluative metering (i.e all the viewfinder considered) will cause the camera to try and make everything grey. As odd it may seem, when shooting in such conditions, we actually over-expose by anywhere between 2/3 and 1.5 stops. Knowing how you dial this into your camera is going to be very useful indeed, and usually involves the rotation of one of the main input dials to move a slider up or down a scale of -3 to +3. If you’re not sure, have a look in the camera manual. Whilst you can correct exposure in post processing, especially with RAW files, the more you can get right in camera, the better the image will be.
- Shooting in bright sunlight: often we will have a default of under-exposing slightly, perhaps 1/3. This will enrich the colours more and remove the chance of highlights being blown (you will find many animals…even the dark ones…have annoyingly reflective fur and skin!). The usual rule of thumb will be to take an image, have a quick check on the back of the camera at the histogram and make sure your curves are neither all touching the right or left hand edges. If they are all crammed to the left and stacked against the side of the graph, you’re under-exposed; and if the same situation exists to the right, well, you’re over-exposed. Adjust your compensation accordingly, and keep shooting!
- Spot metering: this is usually linked to your active focus point, and is very useful in certain situations. A white breasted bird in bright-ish light, for example, can be a pain as the camera in evaluative mode would likely blow the highlights and lose the detail in the feathers. By adjusting to spot metering, and focusing on the brightest part, your camera will adjust to expose for that area. You then “lock” this in place (using either the “*” or AE lock function), recompose, and fire. Spot metering is also very useful in backlit situations to either produce a deliberate silhouette, create rim lighting, or maintain all the detail in the subject whilst throwing the background out. For example, a monkey in a tree with a bright sky will likely create you a number of issues unless you spot meter for the subject using the same technique as we’ve just described. You can also use spot metering to be creative with backlight too. If you want to capture that “rim light” around the edge of the subject, spot meter on your main target, and then purposefully under expose the image by up to 2 stops depending on how much detail you wish to maintain. It can be a tricky technique to master, but one which can yield stunning results.
There are, of course, many other techniques to learn and/or master to improve the quality of your wildlife photography, but these are best learned in the field. Situations vary from continent to continent, animal to animal, and the guide that covers the entire subject, therefore, would be longer than War and Peace. Suffice to say, that by choosing a Naturetrek wildlife photo expedition, you’re going to be giving yourself the best chance to expose yourself (no pun intended) to the variety of situations that we have to deal with.
Enjoy the moment…and keep shooting!
Wildlife photography has its frustrations. Hundreds of hours can be spent waiting for one shot; securing a fleeting thousandth of a second in the life of another creature. We get wet, cold, dusty, dirty, sunburned and battered by the conditions (although…not all at the same time we hope!), and yet we keep coming back for more. The satisfaction of “the shot” is what maintains our enthusiasm, and of course, the very nature of what we are trying to do means that – for the most part – we are in the world’s most special places….a privilege in itself. Remember that, and your wildlife images will convey that feeling to all that see them.